

Editing photos is a necessity these days, either for your blog, for instagram posts or even for your facebook now it's pretty common to edit pictures. Lucky us, there are now a ton of free apps available for editing and one of them is VSCO CAM, you can get either on the appstore or playstore for free.
You have a lot of free filters to choose from and if you want you can also purchase some others for really cheap. Some people get frustrated because they do not understand how to edit their pics properly so today I'm going to give you a step by step guide on how to do it!
1. After you open vsco, go ahead and touch de "+" button on top of the screen so you can choose a picture to edit from your camera roll

2. Already know what picture you want? Great, tap on it and then press the check button on the right corner.


5. Now this is what you're going to see next. Now choose the tool button


7. Okay so the next few steps pretty much depend on you and the photo you're editing. In this case I lowered two points the exposure to make the picture a little more darker, with less light. I truly depends on what you want the picture to look at the end. After changing each thing, remember to tap the check button.


9. From what i've learned, almost every photo (if not all of them) needs at least a little more contrast. Trust me, it will make the picture look so much better, more defined and with more quality. Don't go too crazy, just the necessary amount.

10. Now you can change with this the saturation. What this means is to the right the colors get more intense and to the left less intense. Play with it and see if you like changing it. I didn't this time.

11. This step I consider optional. This is to change the tint, kind of like to give it a blue tone or a more pink-red tone to the picture.

12. I wanted the picture to look a little bit more pink so I added two points to the right. But as I said it depends on the picture so you can skip this step if you want.

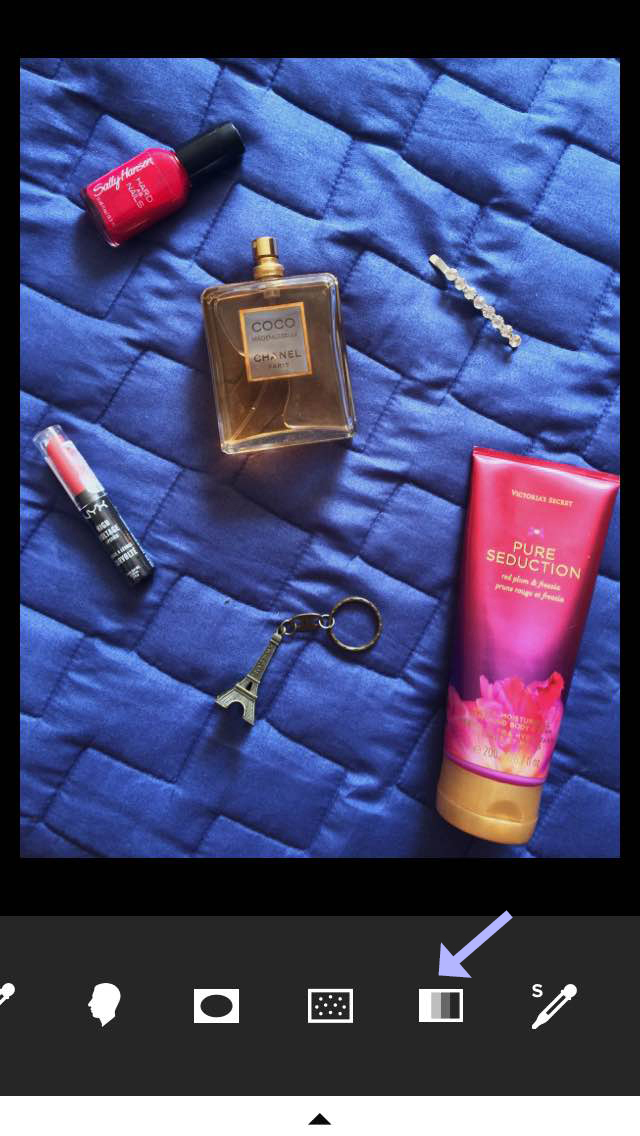
13. The button I'm showing you in this picture is to change the temperature. I didn't change it in this one but you can slide it to the right to make it look warmer (kind of more orange, red tones) or to the left, to kind of make the colors more blueish. As the name itself says, to make it appear warmer or colder.

14. Now let's give the picture little fade. This gives it a kind of " washed" (?) look.
15. Try it. You can go all the way or just a little bit... or not even apply it. It's up to you!


17. There are a lot of filters, so take your time and try the ones you like. Remember! Tap on the filter and you can change the amount of it. I'm applying the filter M3 with 3+. Applying them just a little bit gives them a little something without being too overwhelming.

18. Remember the little triangle? Tap it again and finally touch the check.

19. Now select your now edited image and then go to the bottom and clic on the dots circle to export it. Select "save to camera roll" with the size you want it and that's it!

For some people editing can be kind of hard, but with time you (well me, at least) enjoy it. Sometimes I even do it when I'm bored. Now you're ready to share it where you want, instagram, facebook, tumblr, etc. Don't be afraid to play with settings and filters. This is the final result! I hope you could found this helpful, let me know in the comments please!

Thanks for reading :)


No comments:
Post a Comment